2.1 Network and Bluetooth Configuration
This section mainly introduces how to modify the wired and wireless network configurations of the development board.
Wired Network
Wired Network Configuration - Network Manager Method
By default, NetworkManager + Netplan is used to manage the network. For other platforms, please refer to the corresponding system documentation.
- The
RDK S100root file system is built on Ubuntu-22.04 and does not support enabling or disabling network interfaces using ifup/ifdown by default.
- The
RDK S600root file system is built on Ubuntu-24.04 and does not support enabling or disabling network interfaces using ifup/ifdown by default.
In the Ubuntu system, the network connection configuration of the development board is stored in the /etc/NetworkManager/system-connections/ directory (each network card connects to a .nmconnection file). Common field descriptions are as follows:
- DHCP Configuration: Set
methodin[ipv4]toauto, and the address will be automatically assigned by DHCP. - Static Address Configuration: Set
methodin[ipv4]tomanual, and useaddress1=IP/CIDR,Gatewayto configure IP, mask, and gateway. - Custom DNS: Specify the DNS server using the
dns=field, with multiple addresses separated by semicolons.
ETH0 DHCP Configuration Example
Edit the connection file:
sudo vim /etc/NetworkManager/system-connections/eth0_cfg.nmconnection
[connection]
id=eth0_cfg
uuid=1f3c0cb8-3ef4-4d7f-9f22-0a0f6f0b2222
type=ethernet
interface-name=eth0
timestamp=1773022723

[ethernet]

[ipv4]
dns=10.9.1.2;8.8.8.8;8.8.4.4;
method=auto

[ipv6]
addr-gen-mode=eui64
method=disabled

[proxy]
ETH1 Static IP Configuration Example
Edit the connection file:
sudo vim /etc/NetworkManager/system-connections/eth1_cfg.nmconnection
[connection]
id=eth1_cfg
uuid=1f3c0cb8-3ef4-4d7f-9f22-0a0f6f0b1111
type=ethernet
interface-name=eth1
timestamp=1773022363

[ethernet]

[ipv4]
address1=192.168.127.10/24,192.168.127.1
dns=10.9.1.2;8.8.8.8;8.8.4.4;
method=manual

[ipv6]
addr-gen-mode=eui64
method=disabled

[proxy]
After modification, it is recommended to apply the configuration in the following order:
# Check configuration file permissions (NetworkManager requires root read/write only)
sudo chmod 600 /etc/NetworkManager/system-connections/*.nmconnection

# Reload connection configuration
sudo nmcli connection reload

# Enable the corresponding connection
sudo nmcli connection up eth0_cfg
# or
sudo nmcli connection up eth1_cfg
Example of configuring a static IP using the command line:
# Configure eth1 static IP as 192.168.10.100/24, gateway as 192.168.10.1, DNS as 223.5.5.5 and 8.8.8.8
nmcli connection modify "eth1_cfg" \
  ipv4.method manual \
  ipv4.addresses "192.168.10.100/24" \
  ipv4.gateway "192.168.10.1" \
  ipv4.dns "223.5.5.5 8.8.8.8" \
  connection.autoconnect yes

# Restart the connection for changes to take effect
nmcli connection down "eth1_cfg"
nmcli connection up "eth1_cfg"
Example of configuring DHCP using the command line:
# Switch eth1 to DHCP
nmcli connection modify "eth1_cfg" \
  ipv4.method auto \
  ipv4.addresses "" \
  ipv4.gateway "" \
  ipv4.dns "" \
  connection.autoconnect yes

# Restart the connection for changes to take effect
nmcli connection down "eth1_cfg"
nmcli connection up "eth1_cfg"
Check the current IP/gateway/DNS configuration using the command line:
# Check the device's current IP/gateway/DNS
nmcli device show eth1
For more information on configuration fields, please refer to: Ubuntu Manpage: NetworkManager
The RDK S100 desktop version uses the NetworkManager + Netplan network framework by default. After saving configurations via GUI or nmcli, the configurations are written to /etc/NetworkManager/system-connections/.
You can also directly edit the .nmconnection file in this directory; after editing, run sudo nmcli connection reload and sudo nmcli connection up [connection_name] to apply the configuration.
Wireless Network
Video: https://www.bilibili.com/video/BV1rm4y1E73q/?p=12
The development board needs to be equipped with a wireless Wi-Fi module, supporting both Soft AP and Station modes, and runs in Station mode by default. The usage of the two modes is described below.
Station Mode
In Station mode, the development board acts as a client, connecting to the router's wireless hotspot for networking.
-
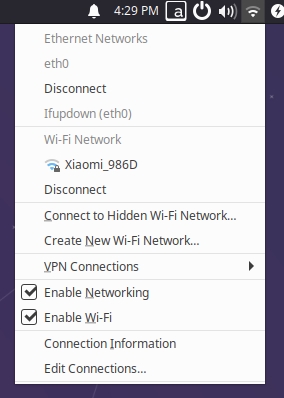
For users using the Ubuntu Desktop version, you can click the Wi-Fi icon in the upper right corner of the desktop, select the corresponding hotspot, and enter the password to complete the network configuration, as shown below:
-
For users using the Ubuntu Server version, wireless network configuration can be done via the command line as follows:
-
Use the
sudo nmcli device wifi rescancommand to scan for hotspots. If the following message appears, it indicates that scanning is too frequent; please try again later.root@ubuntu:~# sudo nmcli device wifi rescan
Error: Scanning not allowed immediately following previous scan. -
Use the
sudo nmcli device wifi listcommand to list the scanned hotspots. -
Use the
sudo wifi_connect "SSID" "PASSWD"command to connect to the hotspot. The following message indicates a successful network connection:root@ubuntu:~# sudo wifi_connect "WiFi-Test" "12345678"
Device 'wlan0' successfully activated with 'd7468833-4195-45aa-aa33-3d43da86e1a7'.tipIf, after connecting to the hotspot, the following message appears, it means the hotspot was not found. You can run the
sudo nmcli device wifi rescancommand to rescan and then try again.root@ubuntu:~# sudo wifi_connect "WiFi-Test" "12345678"
Error: No network with SSID 'WiFi-Test' found.
Soft AP Mode
Wi-Fi AP mode is currently unavailable Continuously updating...
DNS Service
DNS (Domain Name Server) is a server that translates domain names into their corresponding IP addresses.
The DNS configuration of the development board is managed through the /etc/systemd/resolved.conf file. Users can modify this file to complete DNS-related configurations as follows:
-
Edit the
resolved.conffile and add the DNS server address, for example:DNS=8.8.8.8 114.114.114.114 -
Apply the DNS configuration using the following commands:
sudo systemctl restart systemd-resolved
sudo systemctl enable systemd-resolved
sudo mv /etc/resolv.conf  /etc/resolv.conf.bak
sudo ln -s /run/systemd/resolve/resolv.conf /etc/
Proxy Configuration
Proxy configuration refers to setting up a network proxy. In network communication, a proxy server acts as an intermediary between the client and the target server. The client's request is first sent to the proxy server, which then forwards it to the target server. The target server's response is also returned to the client through the proxy server.
Edit the ~/.bashrc or /etc/environment file. If configuring the proxy for the current user, edit ~/.bashrc; if configuring the proxy for all users, edit /etc/environment.
Add the following content to the file (using HTTP proxy as an example):
http_proxy=http://proxy_server_address:port
https_proxy=http://proxy_server_address:port
ftp_proxy=http://proxy_server_address:port
no_proxy=localhost,127.0.0.1
After saving the file, run the following command to apply the configuration:
source ~/.bashrc
System Update
Do not execute before the product is released
For system security and stability reasons, it is recommended that users update the system using the apt command after installing the system.
The /etc/apt/source.list file contains the list of software sources for the apt command. Before installing software, you need to update the package list using the apt command.
First, open the terminal command line and enter the following command:
sudo apt update
Next, upgrade all installed packages to the latest versions using the following command:
sudo apt full-upgrade
It is recommended to use the full-upgrade option instead of upgrade so that dependency packages are also updated synchronously when related dependencies change.
When running the sudo apt full-upgrade command, the system will prompt you about the data download and disk space usage, but apt does not check if there is sufficient disk space. It is recommended that users manually check using the df -h command. Additionally, the deb files downloaded during the upgrade are saved in the /var/cache/apt/archives directory. Users can delete the cache files using the sudo apt clean command to free up disk space.
After executing the apt full-upgrade command, drivers, kernel files, and some system software may be reinstalled. It is recommended that users manually reboot the device for the updates to take effect using the following command:
sudo reboot
Bluetooth Configuration
Initialization
Users can use commands to check whether the Bluetooth process is normal as follows:
ps ax | grep "/usr/bin/dbus-daemon\|/usr/lib/bluetooth/bluetoothd"
/usr/bin/dbus-daemon

/usr/lib/bluetooth/bluetoothd
Users can use commands to check whether the Bluetooth controller is normal as follows (note that the <MAC Addr> in Controller <MAC Addr> in the command example below will vary depending on the actual Bluetooth controller):
bluetoothctl list
Controller F0:68:E3:22:7E:91 ubuntu [default]
Network Configuration and Connection
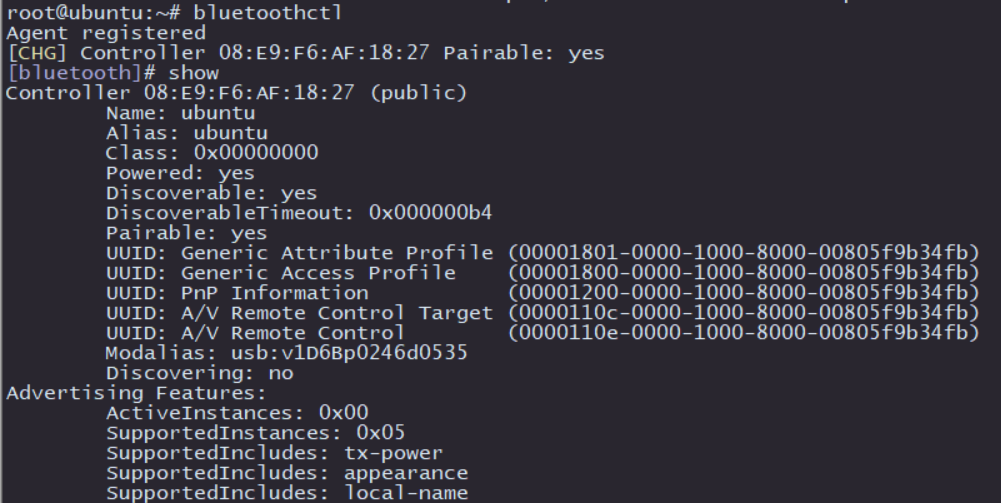
Execute sudo bluetoothctl to enter the Bluetooth configuration interface in interactive mode. If device information similar to the image below appears, it means the Bluetooth device has been recognized. Then use show to view Bluetooth information, paying attention to the powered and discoverable status of Bluetooth.
Execute power on to enable Bluetooth, as shown in the image below:

To allow Bluetooth to be discovered by nearby devices, execute discoverable on to enable Bluetooth and turn on the Bluetooth discoverable property, as shown in the image below:

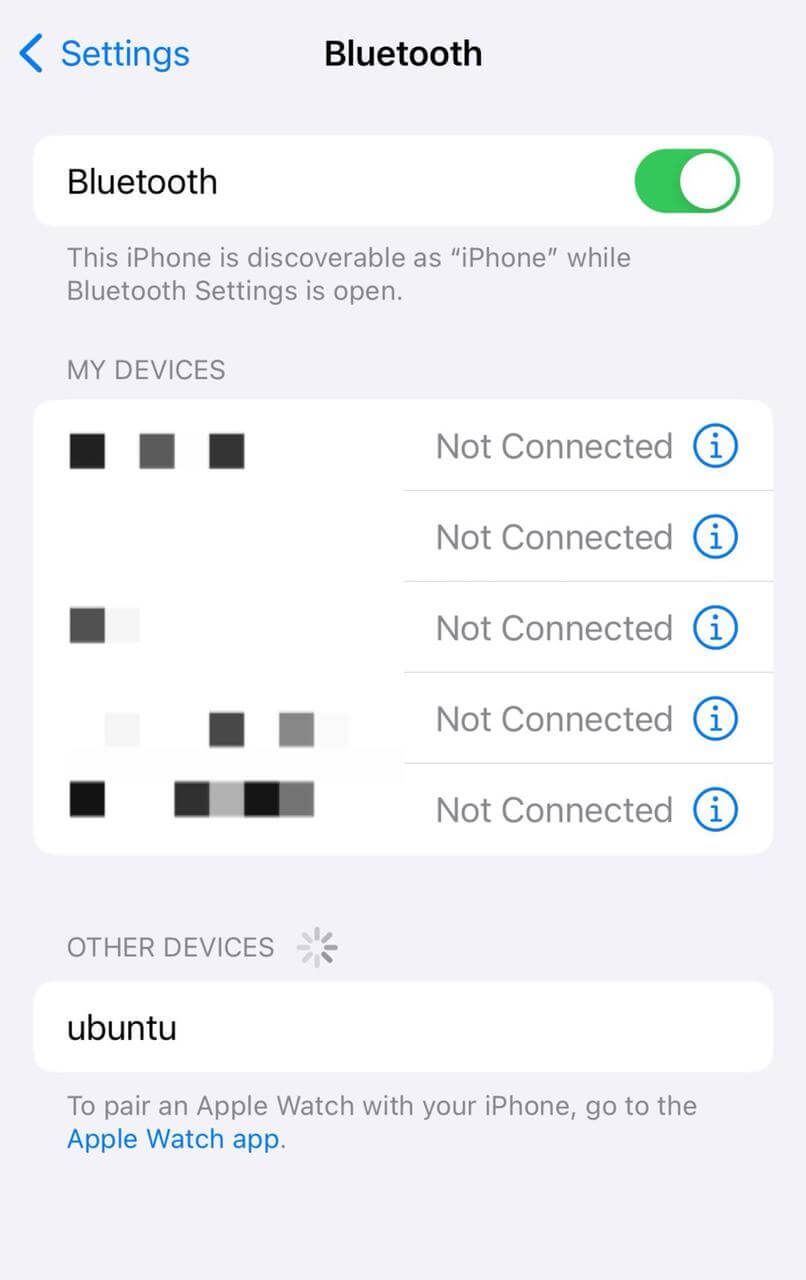
At this point, using a phone or computer to scan for Bluetooth will reveal a Bluetooth device named ubuntu:
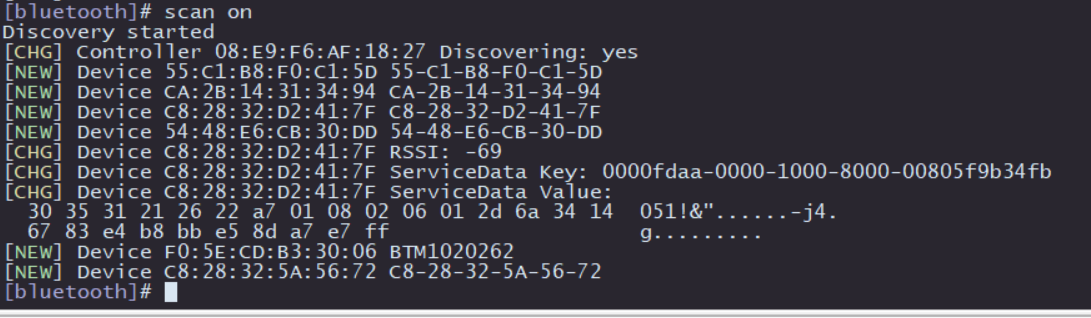
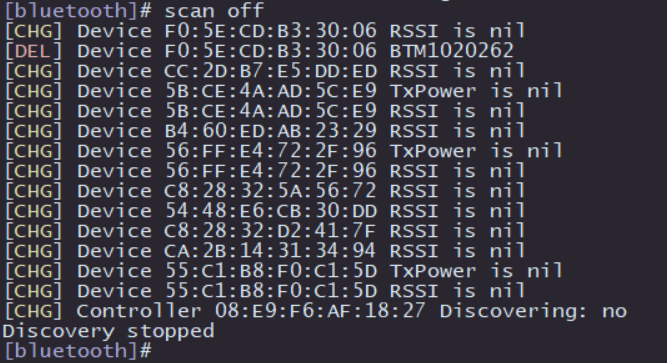
Next, test the active scanning function of Bluetooth. Enter scan on in the bluetoothctl interactive interface to enable active scanning. It will periodically print nearby devices. It should have discovered your phone device. Use scan off to disable the scanning function and summarize the list of scanned Bluetooth devices:
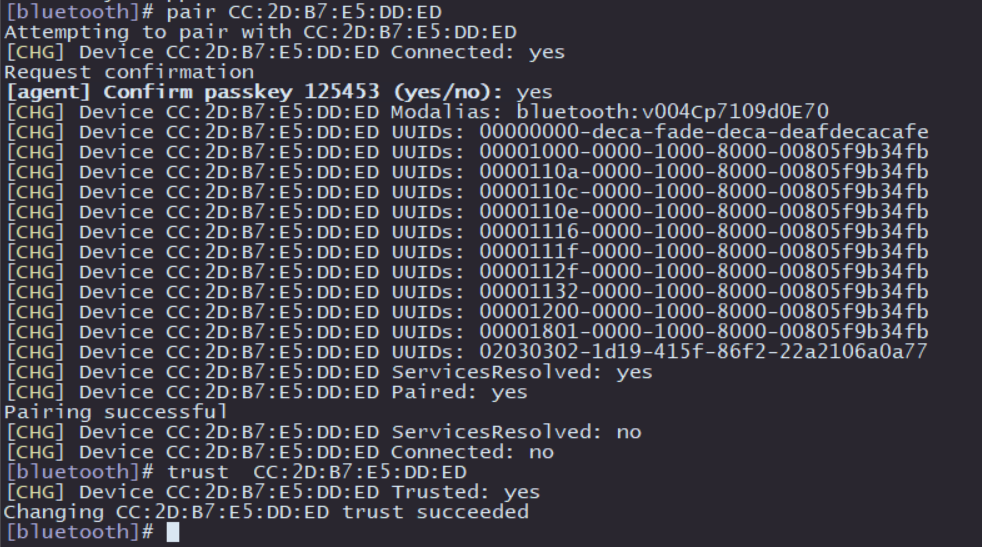
Then, proceed to pair with other Bluetooth devices:
-
Pairing command:
pair [targetMAC]. After entering this command, typeyesas prompted, and select thePairoption on the peer Bluetooth device to complete pairing. -
After successful pairing, you can use
trust [targetMAC]to enable automatic connection the next time.
After the above operations, the basic functions of Bluetooth scanning and pairing are completed. For more advanced features, please refer to the official help documentation of BlueZ.